First Day of Kindergarten Activities and First Week Plans
My blog post “What I Do: First Day & Week of FDK” is one of my most-read posts of all time — but it’s from 2017! Since then, I’ve taught a few more classes, had my own kids go through Kindergarten, and gathered lots of new ideas to share. This updated version includes fresh routines, tips, and first day of Kindergarten activities!
As many of you know, I’m not currently in the classroom — but if someone said, “Yukari, we need you to teach Kindergarten in two weeks,” this is exactly how I’d plan my first day and week!
*This blog post is about what I would plan/set up for the first day and week of Kindergarten. If you need help wrapping your head around start up and what to prepare before the first day you can check out my blog post “Kindergarten Start-Up Made Simple: How I Prepare for Back to School and Ease First-Day Jitters”!
Before We Begin…
I just wanted to make a quick note that as always, my sample is meant to be for inspiration and not something that should be followed to a T. Every school/board is different in how the first day will run, based both on logistics and demographic. My old school board had everyone starting from Day 1 but I know my children’s board has all SK’s start on Day 1 and JK’s starting for only an hour on Day 2 or 3 (classroom visit with a parent!) and then their first full day is on Day 4. In this post I’ll be assuming that I’ll be following the everyone starts on Day 1 schedule.
Also, I feel like this is a given but I always say your team is your best resource! If it’s your first year at a school, your team will know what has worked well in the past for your schedule and demographic. Use what they have done in the past that has worked well if they are willing to share! As the saying goes, no need to reinvent the wheel🤍
Ok, now that the disclaimers are out of the way… let’s get started!
First Day of School
Arrival/Entry – 25 minutes
Even if you’re not scheduled for morning duty, it’s worth being outside during that time—especially for the first day, and ideally for the first week. It’s a great chance to greet your new students and their parents, help everyone feel welcome, and set a positive tone for the day. Give students a name tag (I use large rectangular sticker labels with their names written on them), show the children where to put their backpacks as they come into the Kindergarten pen, and gently remind them that when they hear the bell, it’s time to head to their backpacks.
💡 Teacher Tip:
If you have multiple Kindergarten classes in one pen, have each class pick a colour and put that colour on the name tags (you can draw a border with a marker or simply draw a coloured dot). When the bell rings, if any students are confused where to go to line up, you will easily be able to tell and help them to the correct line based on the colour on their name tag!
When the bell rings, show students how to line up with their backpacks. Once they are all ready, have them follow you or your teaching partner into the room.
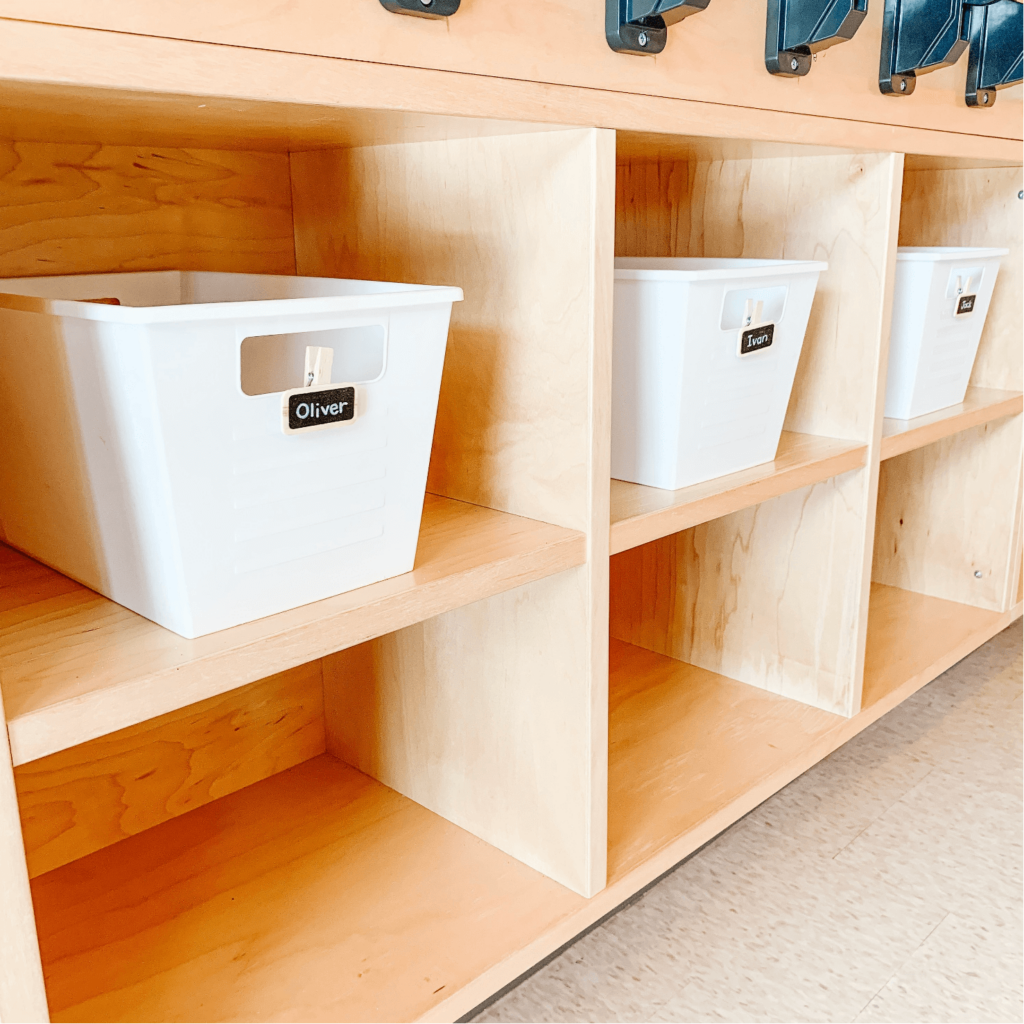
On that very first entry, take time to introduce the routines: hanging coats and backpacks on their hooks, switching from outdoor shoes to indoor shoes, and putting away any extra clothes parents have sent (we often help students place these in their bins on the first day). As students finish their entry routines, invite them to choose a learning centre to explore.
Soft Start/Literacy Based Learning Centres – 20 minutes
I like to start each day with soft start, literacy-based learning centres because they give us time to check in with and support the little ones who need extra guidance or adult attention. We keep soft start in place all year because it helps students transition from home to school more smoothly, gives them time to connect with friends, and allows us to greet each child and assist with entry routines (which many students still need well beyond the first week!). It also gives us a few minutes to check mail bags and take care of small administrative tasks without disrupting the flow of the morning.
On the first day, I always choose simple, self-explanatory and/or open-ended centres—nothing that requires a lot of instructions. You and your teaching partner will likely be busy helping students with their entry routines and, in some cases, comforting a few upset friends. Setting out centres that students can explore independently keeps the morning calm and prevents extra stress for everyone!
Here’s a chart that shows the centres I put out!
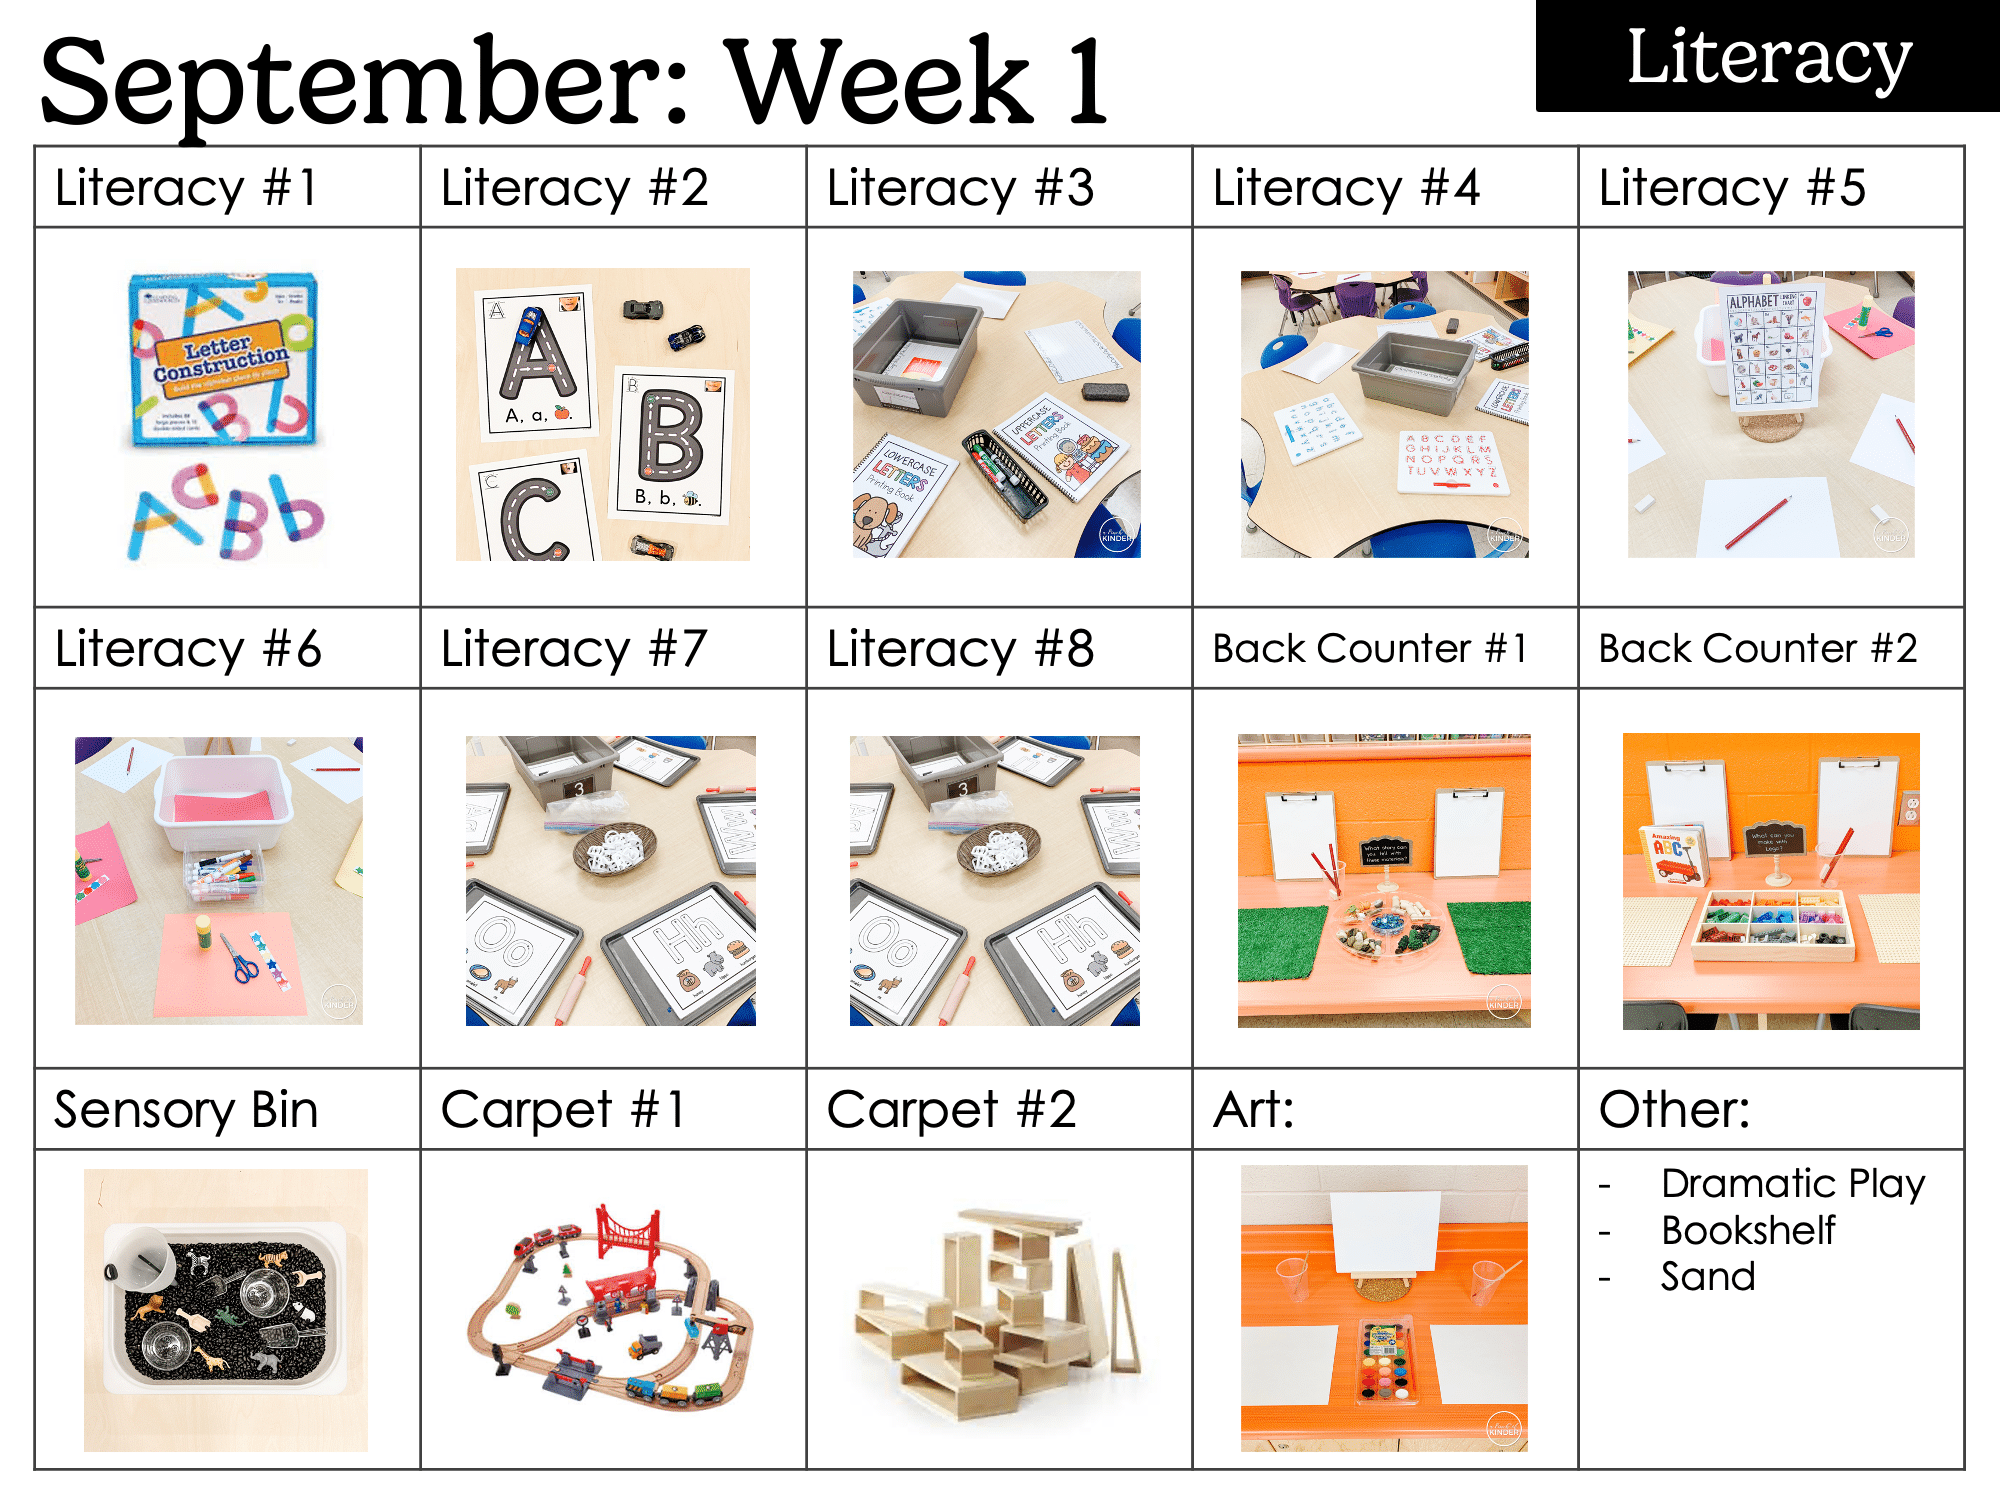
You can download a linked/editable copy of this file at the end of this blog post!
Here’s some more detail about the things I put out during this learning centre block:
Lego Centre:
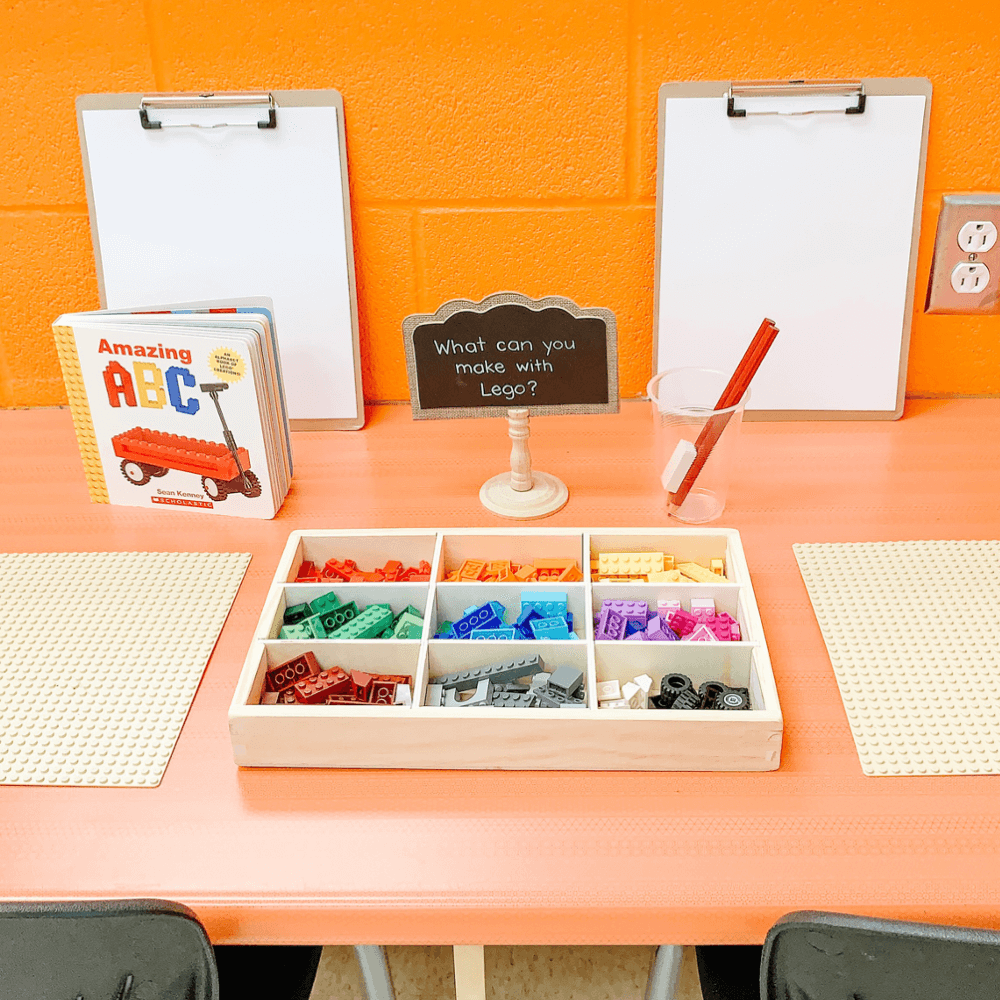
An open-ended Lego centre is perfect for the first week of school because it’s familiar, easy to use, and naturally engaging for most students. With no complicated instructions, children can start building right away—whether they’re creating something from their imagination or simply exploring how the pieces fit together. It encourages creativity and fine motor skills while giving educators time to focus on helping students with entry routines and settling in. Bonus: it’s usually one of the quieter centres!
Small World Play Centre
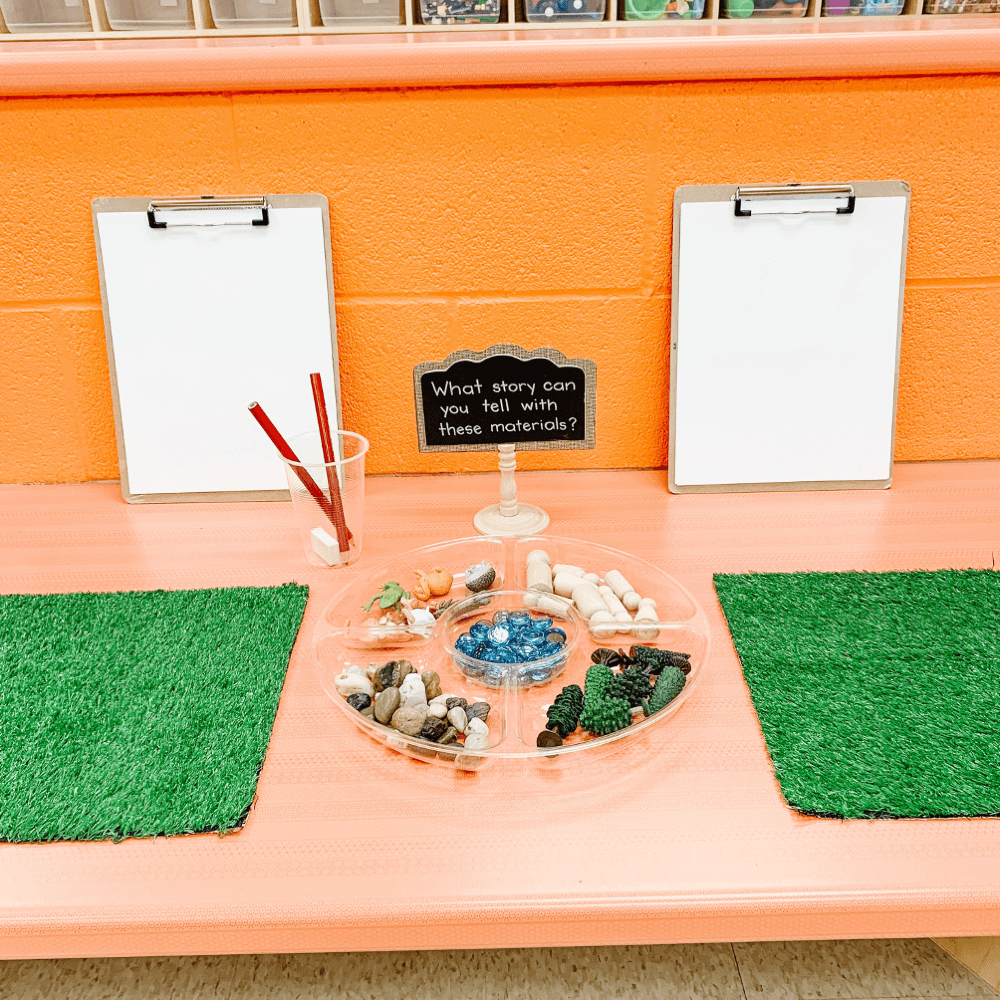
Loose parts like animals, people, and natural materials invite students to create and share their own stories. Perfect for sparking imagination while keeping the activity simple and independent during the first week! It’s also a great way to gain insight into students’ oral language skills as you observe and listen to their storytelling around the classroom.
Play Dough Centre
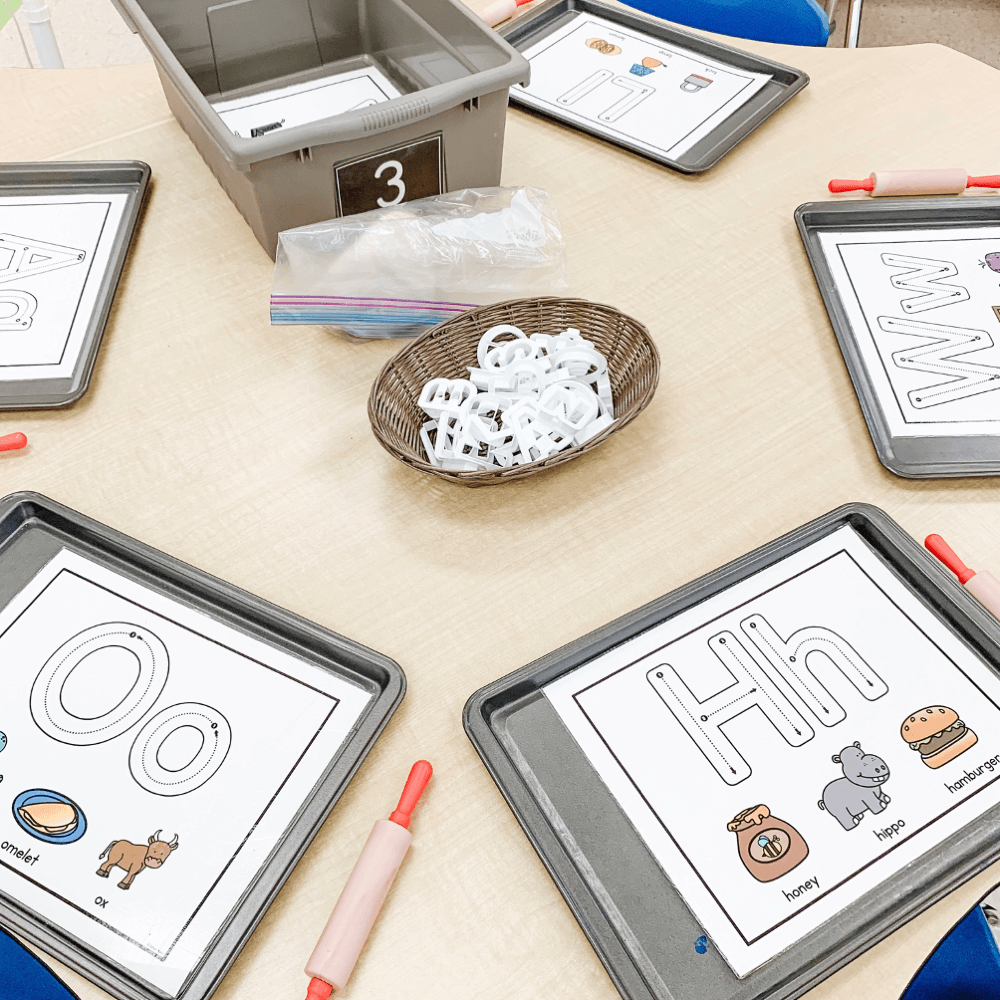
A play dough centre is perfect for building fine motor strength, hand-eye coordination, and creativity—all while keeping students engaged and calm. Using letter mats and cutters adds a literacy component, giving students a hands-on way to explore letter shapes and sounds. It’s an easy, low-prep activity that works beautifully during the first week of school when you want students to work independently while you support entry routines!
Want these play dough letter mats? You can find them here: Hands On Formation: ABC Play Dough & Loose Parts Mats
Letter Roads
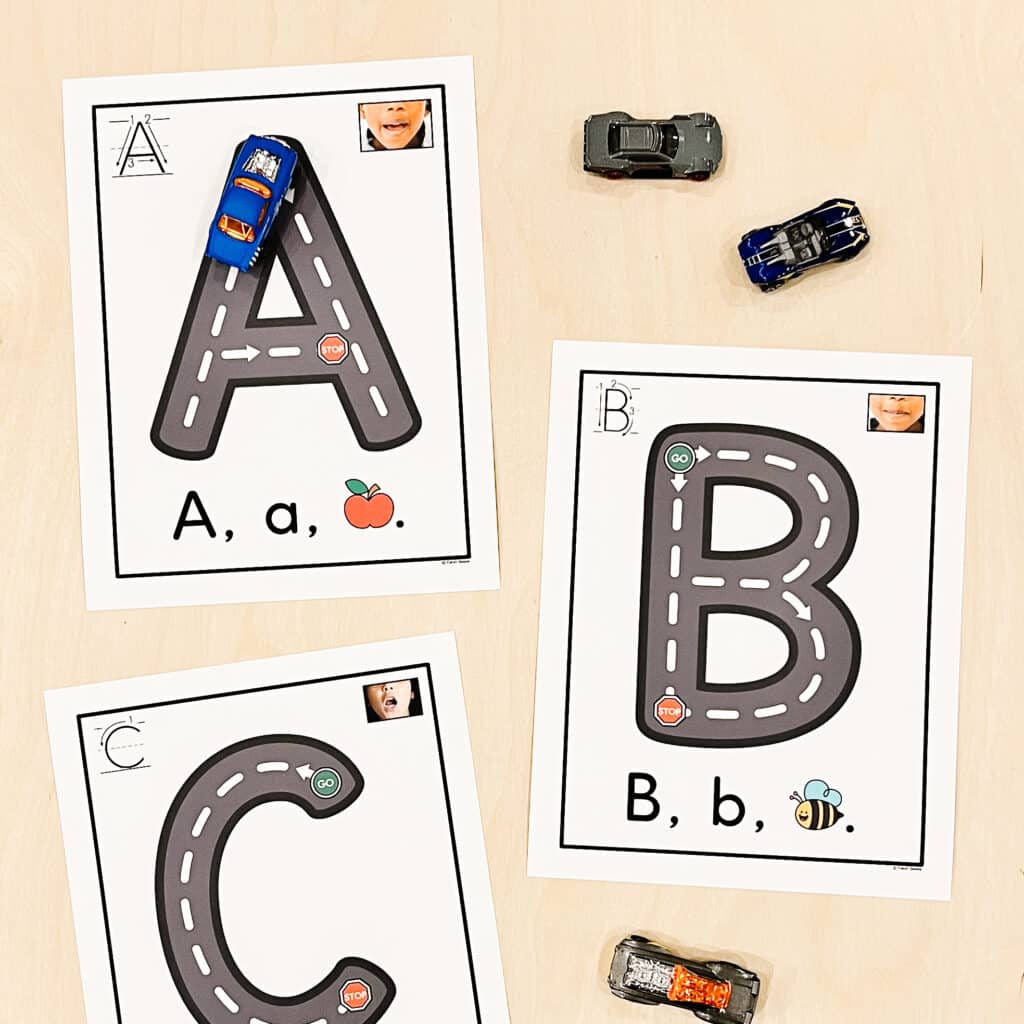
This engaging centre combines letter recognition with fine motor play, making it perfect for the first day or week of school—especially for getting students (and often the boys!) excited about the classroom and eager to learn. Students “drive” toy cars along the road-shaped letters, practising correct letter formation in a fun, hands-on way. It builds letter knowledge, strengthens hand-eye coordination, and keeps learning active for those who thrive on movement and play. And if they’re just driving the cars on the table instead, that’s okay too! At the start, our goal is simply to have them engaged, comfortable, and having fun at centres.
Want these road letter printables? Grab them here: Hands-On Alphabet Centre: Letter Roads
Other First Week Centre Ideas:
Alongside our Lego, storytelling, playdough, and road letter centres, I also open a few other simple, high-interest centres that are easy for students to explore on their own including:
- Blocks – Open-ended building encourages creativity, problem-solving, and teamwork.
- Train Set – A familiar, collaborative play option that draws students in.
- Creation Station – Just coloured construction paper, scissors, glue sticks, and stickers for open-ended crafting.
- Blank Paper + Alphabet Chart – A simple writing centre for open-ended drawing and early writing.
- Puzzles – Great for quiet focus, perseverance, and fine motor skills.
- Dry Erase Alphabet Books, Whiteboards & Dry Erase Markers – Low-pressure space for drawing, mark-making, or letter practice.
- Dramatic Play – Keep it minimal at first with just a few pieces of furniture and simple props to spark imagination.
- Bookshelf – With a selection of picture books including back to school reads and high interest books like Paw Patrol (If you have some info on your students interests, it would be a great idea to mix in some books based on their interests here!).
- Sandbox – Sensory play that encourages social interaction and imaginative play. (Note: There are years I’ve kept sandbox closed the first day/week depending on the make up of the kids. If you are unsure, you can keep sandbox closed until you meet the kiddos to make a decision!)
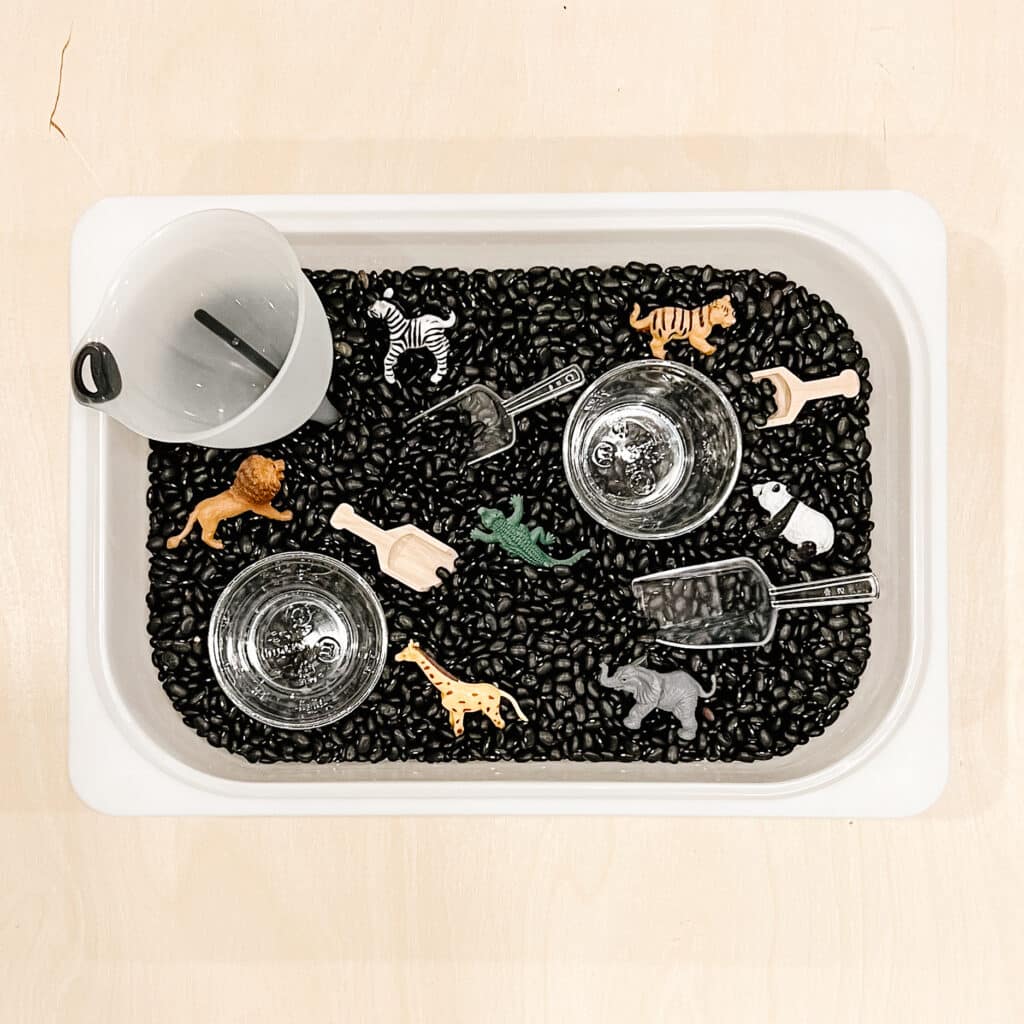
- Sensory Bin – For the first week, I keep it simple with black beans, scoops, funnels, containers, and measuring spoons for scooping and pouring. This year I added a few animal figurines to make it even more high-interest while still focusing on the basics—keeping materials in the bin and using tools gently. Once students master those skills, I start adding academic components like letter hunts, counting challenges, or themed objects to match the current learning needs in the classroom.
Here’s a pic of my first week sensory bin:
Again, these centres are all low-prep, familiar, and open-ended, which means you can focus your attention on helping students settle in, learning names, and establishing routines without constantly needing to give instructions or troubleshoot activities.
Want more ideas for this first centre block? Take a peek inside my past classroom setups in these posts:
- Classroom Reveal 2016: My Second Classroom
- Classroom Reveal 2017: New School, New Layout!
- Classroom Reveal 2019: My First Year Back from Maternity Leave
Carpet Time #1: Procedures & Routines – 25 minutes
At the end of centre time, I use a simple signal to get everyone’s attention:
I say, “Hands on top, that means stop!” and the students stop and put their hands on their heads. Then I say, “When I say go, please put centres away and come to the carpet. Go!” We go around and show students exactly where each item belongs so they learn how to tidy up properly.
Once most students are at the carpet, I sing a quick song to reinforce/set carpet expectations:
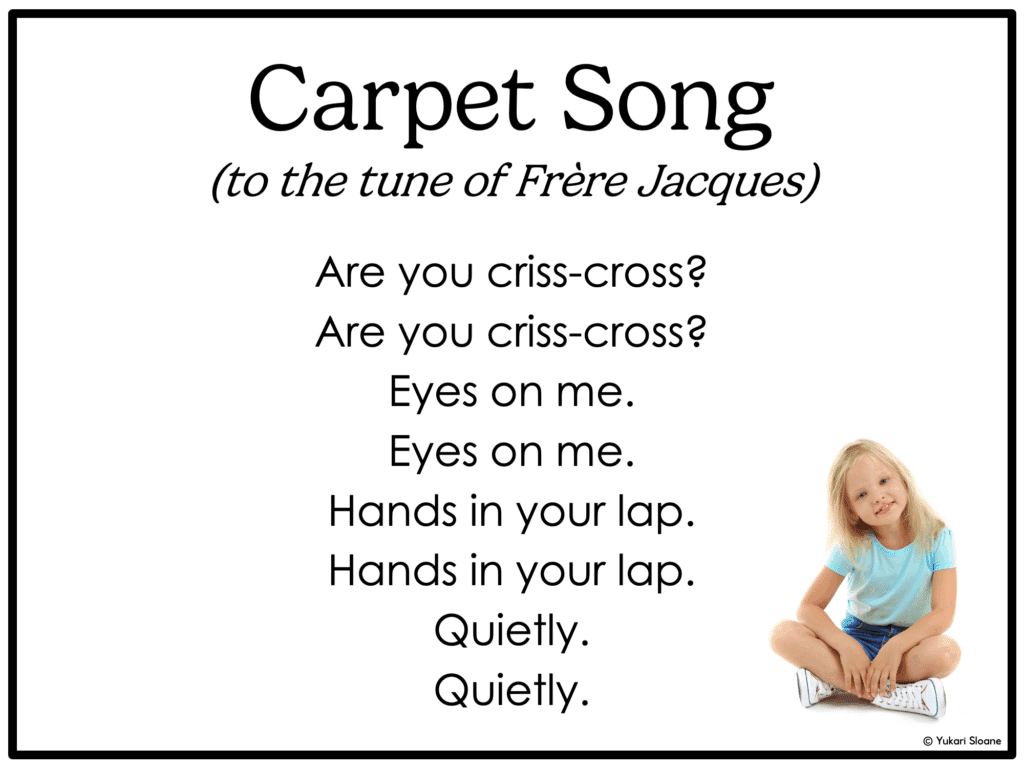
Then I add:
I like the way that ______ is sitting,
______ is sitting, ______ is sitting.
I like the way that is ______ sitting,
Oh so very quietly!
(Fill in the blanks with names of students who are modeling great carpet behaviour. You can change the last line to other carpet behaviours you want to see like “with their hands to themselves” or “with their eyes one me!”)
I use this song all year when we’re meeting at the carpet to remind students of carpet expectations and reinforce positive behaviours in a fun, up-beat way!
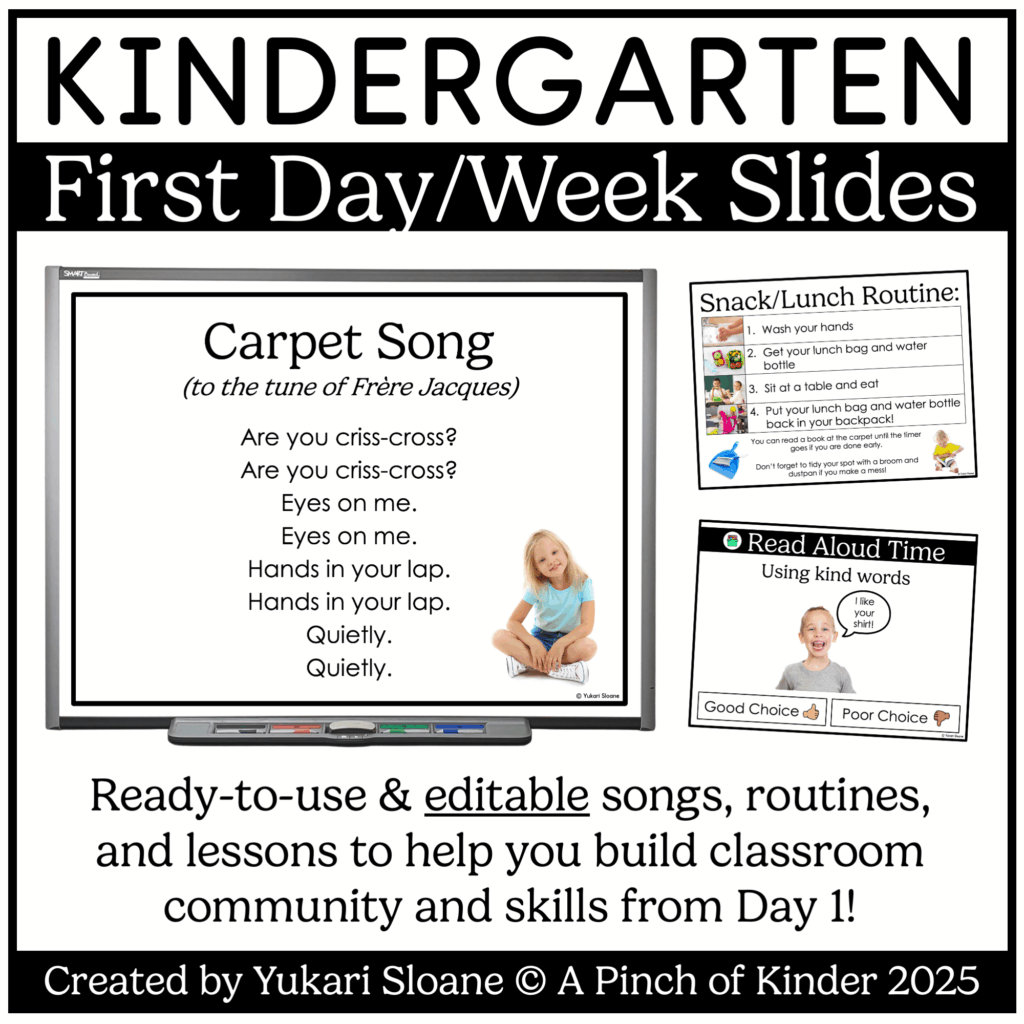
If you want to grab my first day/week slides you can do so here: https://www.teacherspayteachers.com/Product/Kindergarten-First-Day-Week-Slides-Rules-Routines-Classroom-Community-14243865
Want a version where the expectation is not criss-cross or hands in your lap? I included a few variations if you want a version that is more inclusive for your most wiggly learners + an editable slide so you can completely customize the wording to the song😉
After we’re settled, I quickly introduce myself and my teaching partner and welcome the students to our classroom.
Name Song
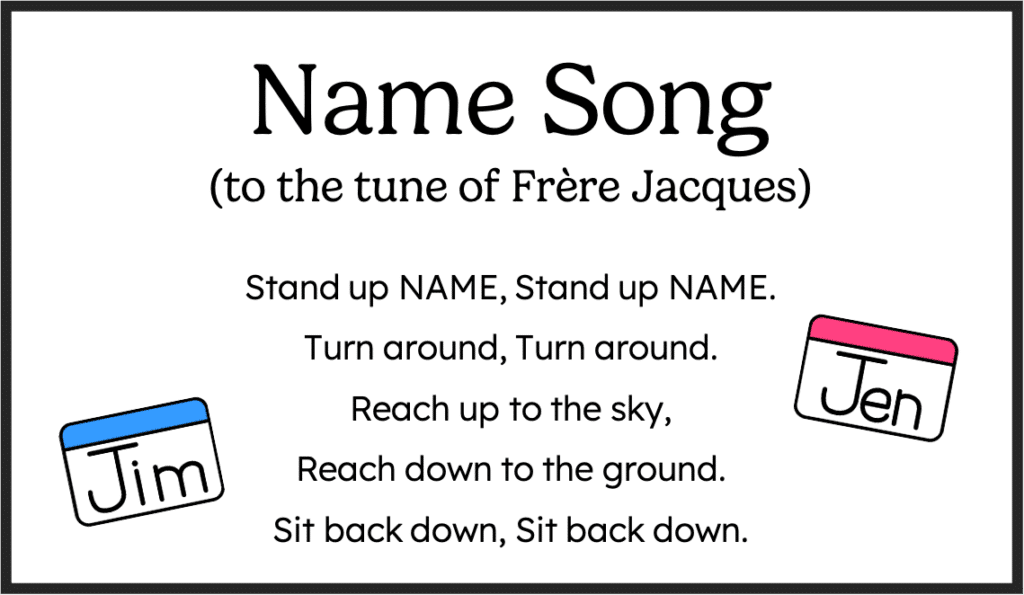
Next, we practise our Name Song—a fun way to learn each other’s names while also introducing a few important classroom rules (voices off during carpet time, following directions quickly etc.) I usually start by singing my partner’s name and having her demonstrate the actions. If I have a large class, we start with 5–10 students and then do the rest throughout the day so it stays manageable.
The song goes like this:
Bathroom Procedures:
Next, we go over our bathroom procedures. We have a bathroom in our classroom, and students are allowed to go anytime during centre time. I prefer they don’t go during carpet time (since we keep it short), but at the beginning of the year, especially with our JKs… I’m flexible! I’d much rather they miss a few minutes of instruction than have an accident!
Our classroom bathroom doesn’t have a lock, so we teach students that only one person should be in there at a time. The rules are simple:
- If the bathroom door is open, it’s available.
- If you are using the bathroom, close the door.
- When you’re finished, leave the door open so others know it’s free.
- If the door is closed, you must knock.
- If you’re inside and someone knocks, you must answer.
We model these steps on the first day and have students practise so everyone understands the routine.
I also make a point to reassure parents that accidents at school—especially in the first few weeks of JK—are completely normal, even if their child hasn’t had one at home in years. In a busy Kindergarten classroom, it’s common for 25+ children to share one bathroom. This often means waiting in line, and we don’t always have an extra adult available to walk a child to the primary bathroom (and even if we could, it can be quite a walk depending on the school).
I remind students that at school, you should go to the bathroom as soon as you feel the need—because you might have to wait your turn (or walk to the nearest bathroom if you’re out of the classroom like the library, the gym etc.) and you need to be prepared for that. This simple reminder helps reduce accidents and encourages independence.
Next, we start an “At Centres” chart. At the top, I read them the title:
“At centres, super students…”
We brainstorm together what super students do during centre time. Often, the SKs already have lots of good ideas and I really encourage them to be good leaders and share their expertise! They usually say things like:
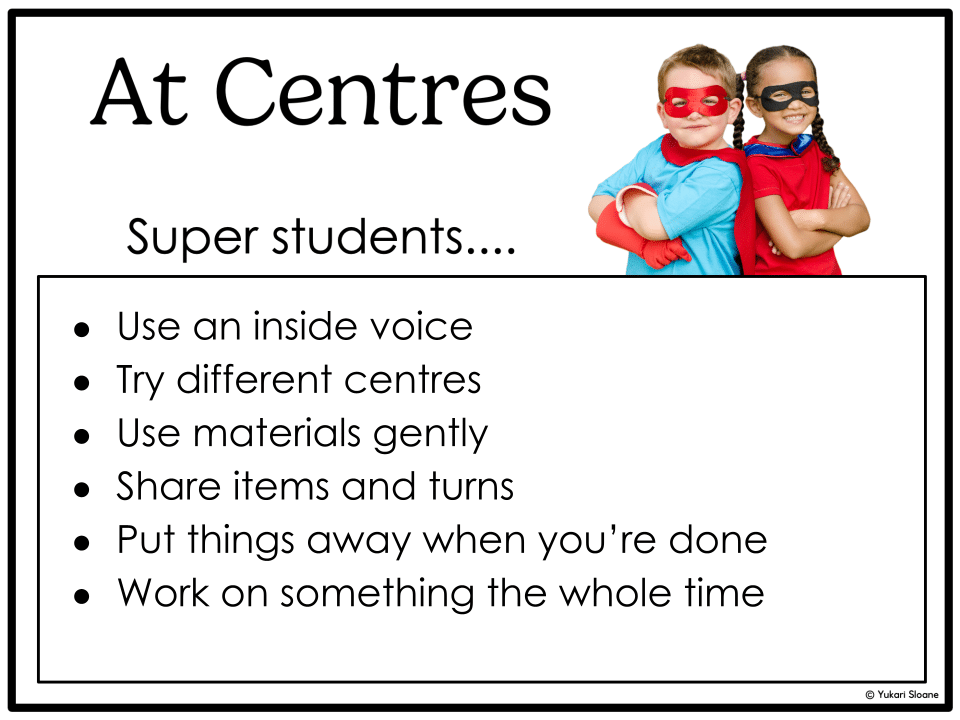
I invite them to share what they know and write their ideas on the chart. Throughout the day/week, after each centre block, we quickly revisit the chart and ask if there’s anything else to add. By the end of the first week, the anchor chart is full of student-generated expectations that they feel ownership over—and that we can refer back to all year long!
💡 Teacher Tip:
If you’re running short on time, move the “At Centres” anchor chart activity to before the next centre block instead. The priority is to go over snack procedures before snack time so students know exactly what to do at snack time!
Snack Time – 15 minutes
We quickly go over each step in our snack routine whole group…
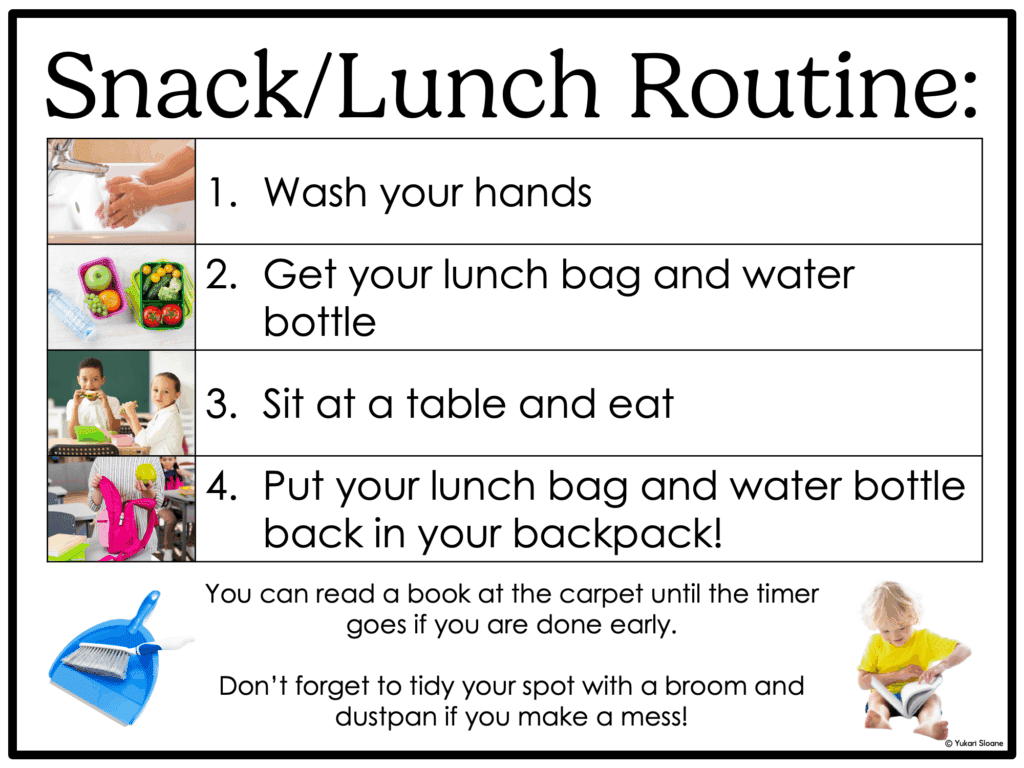
Then we guide them through it step by step! In our class, I call a couple of students at a time to line up in a straight line at the sink. I remind them to wash their hands at the sink and dry them with paper towels before getting their lunch bags and choosing a seat at any table (we don’t assign seats).
I set a large visual timer for 10 minutes. I love using this timer because students can see the red section getting smaller as time passes. If a student finishes their snack before the timer goes off, they:
- Put their snacks away.
- Make sure their spot is clean (we have two mini brooms and dustpans they can use if needed).
- Pick a book from the bookshelf and read on the carpet until the timer beeps.
When the timer goes, students put their books and snacks away and come to the carpet.
DPA – 10 minutes
I like to introduce GoNoodle on the first day. I choose a student who is sitting nicely to come up and pick the first song. While they are deciding, I remind the rest of the class to keep their eyes on the screen and think about which song they might choose if they are picked next.
We usually do 2–3 GoNoodle dances. After each song, I review our GoNoodle rules as needed:
- Stay in your space
- Keep hands to yourself
- Follow the moves on the screen
My teaching partner usually supervises GoNoodle while I set up the next round of learning centres.
Note: I wasn’t sure if GoNoodle was still big like it was when I was in the classroom so I polled Kindergarten teachers on Instagram.. and the results were split. Half said they still love and use it regularly, while others said their students prefer different brain breaks!
So here are brain break favourites recommended by current Kindergarten teachers you can add to your brain break rotation:
Most Recommended:
- Danny Go! (by far the top pick)
- DJ Ralphi
- Coach Corey Martin
- Themed YouTube brain breaks like Mario Brain Break Party (chasing/freeze dance styles)
Other YouTube Channel Favourites:
- Kidz Bop
- Koo Koo Kangaroo
- Just Dance
- Jack Hartmann
- Phonics Man Would You Rather videos
- DJ Raffi
- Tabata Kids
- Yo Re Mi
- Mooseclumps
- PE Bowman (Dashes)
- Sing Play Create
Yoga & Mindfulness Picks:
- Cosmic Kids Yoga
- YoReMi Yoga
- Mme Mindset (French)
- PE with Mr. G
- Salamander Yoga
- Rainbow Relaxation
- Moovlee
- Yoga Guppy
- Coach Brenda Becker
- The Mindfulness Teacher
Carpet Time #2 – 20 minutes
Because we go to the library after this period, this is the perfect time to do our school tour. The goal is to help students learn where important places are in the school (the office, library, gym, etc.) and to practise lining up and walking in the hallway.
We start by reading Pete the Cat: Rocking in My School Shoes by Eric Litwin. After reading, I ask students to share the places Pete visited in his school. Then I say, “Now we’re going on a tour of our school!”
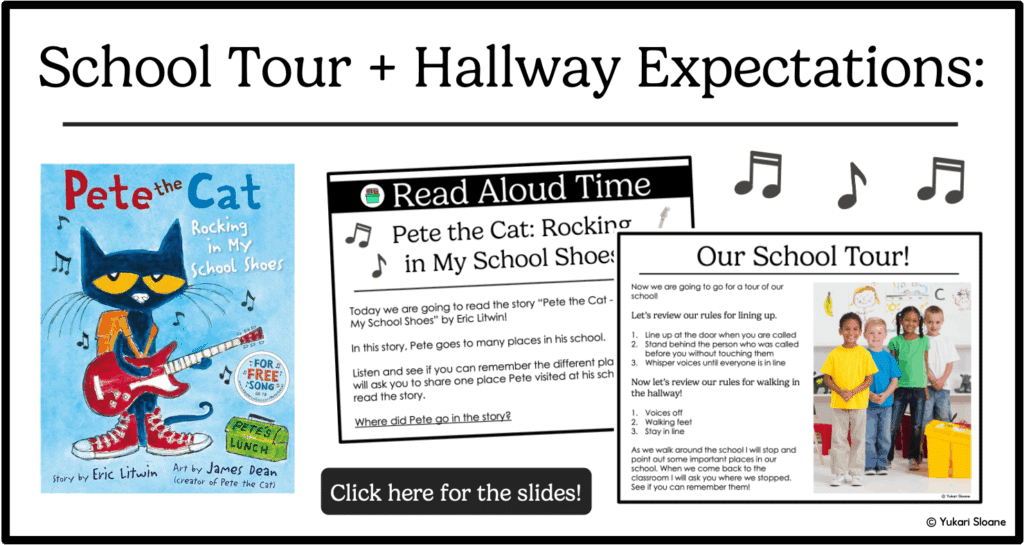
I call 2–3 students at a time to line up so we can give reminders and support as needed. Once we’re lined up, we quickly review our “mission” and hallway expectations:
- Mrs. Sloane will stop and point out important places—listen and remember them!
- When we return, I’ll ask you to share what you saw.
- Voices off in the hallway.
- Walking feet, stay behind the person in front of you.
We say our little rhyme together: “Fingers on our lips, hands on our hips!” (This reminds students to keep their voices off and hands to themselves.)
Then we start the tour!
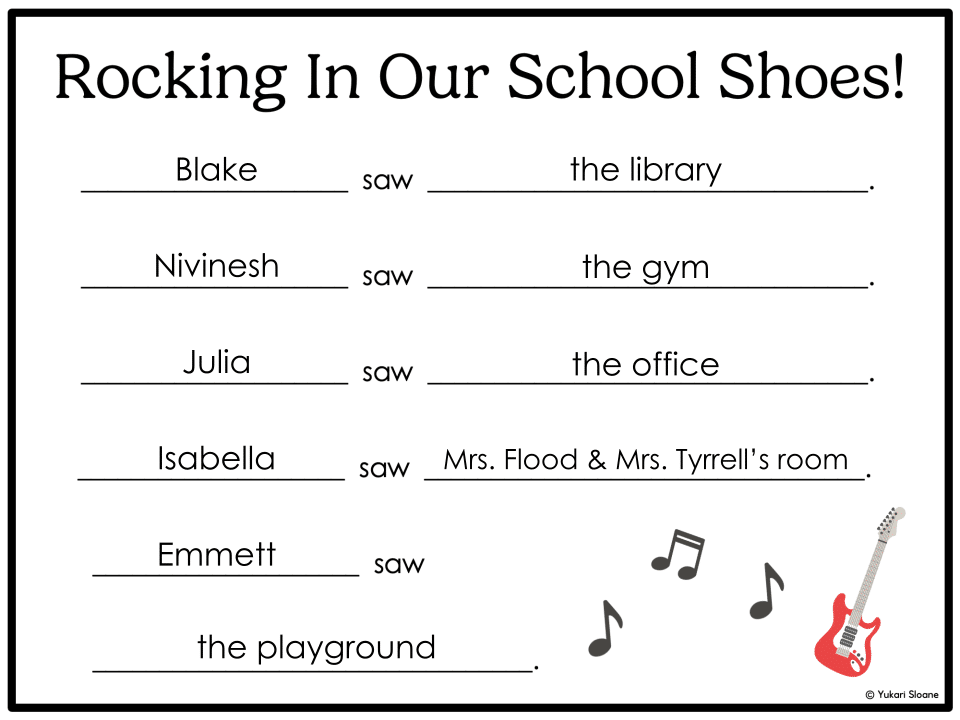
When we return, we gather on the carpet to share the places we visited and fill in the chart below. This helps students remember where we went and also gives them another opportunity to hear and learn the names of their classmates. Here’s what our completed chart looks like:
Learning Centres #2 – 30 minutes
Although my schedule technically has preps until lunch, I know that’s not realistic for most classrooms—so I’m adjusting this plan to reflect a day with fewer preps to make it more useful.
We start with a quick review of our “At Centres” anchor chart from earlier in the day. Again, we send students off in small groups of 2–3 at a time to prevent chaos and give everyone a chance to hear each other’s names as often as possible.
Students are invited to explore the same simple centres as the morning (I keep my centres consistent for the entire week unless I notice a change is needed). In the morning, I offer a mix of play-based and literacy-based centres; in the afternoon, the mix shifts to play-based and math-based.
During this time, we circulate to build connections, guide any wanderers toward an activity, and support students who need help joining in. If there’s a moment, I also pull students individually to take headshots—these are incredibly useful later for making name cards for the writing centre, labeling portfolios, and other classroom projects!
Here’s what the finished name cards look like!
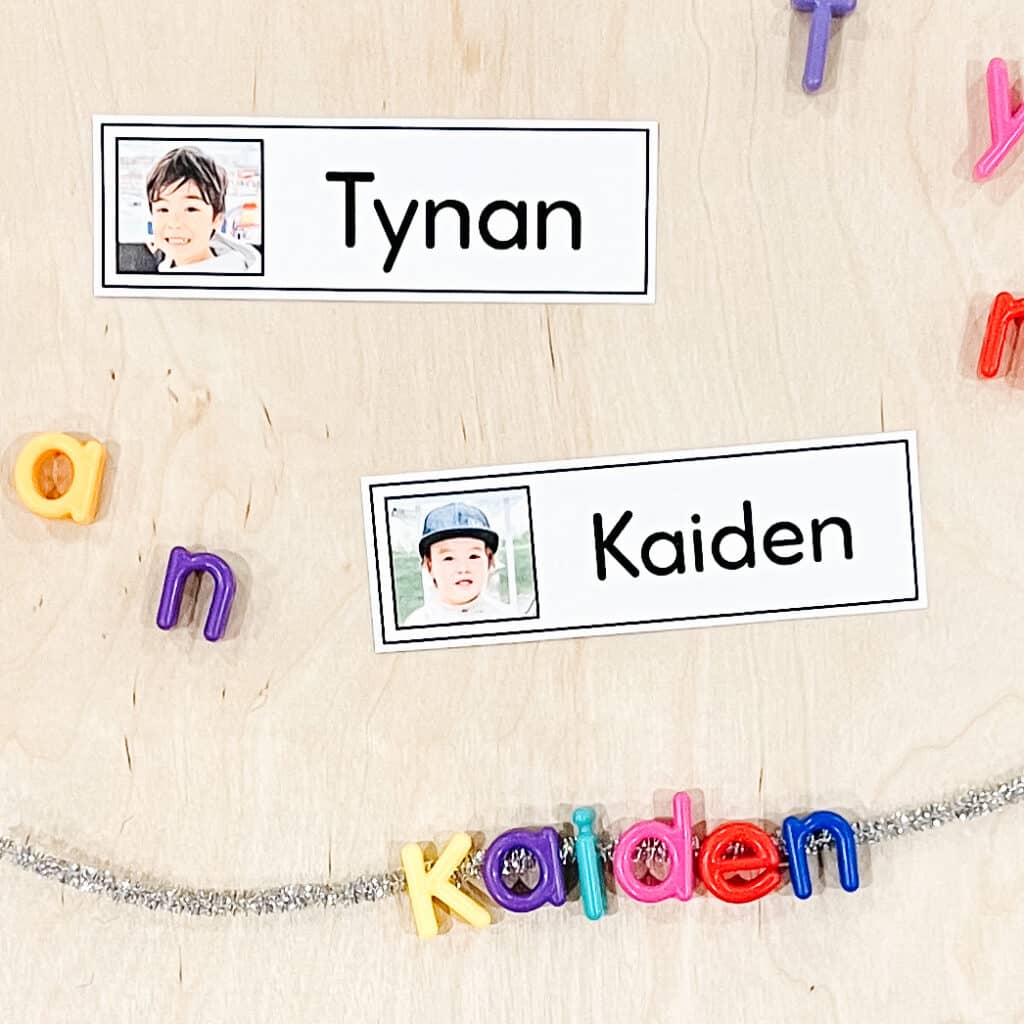
You can grab the free template to make these name cards and other FREE name activities here: Name Activities for Kindergarten: Free Editable Printables
Prep – 30 minutes
On my schedule, I have a prep period every day at this time, but if you don’t, I would simply continue centres until lunch. Be sure to tidy up at least 10 minutes before the lunch bell and take time to review lunch rules and routines—both for eating indoors and for playing out!
Yes it’s your prep. But I highly recommend coming back (unless your partner is comfortable leading this part on his/her own) to teach/review lunch rules and routines at least every day for the first week! We want students to have clear expectations before they are in a busy, less supervised environment!
Some things we go over:
Lunch Routine: Same as snack routine so this should just be a quick review!
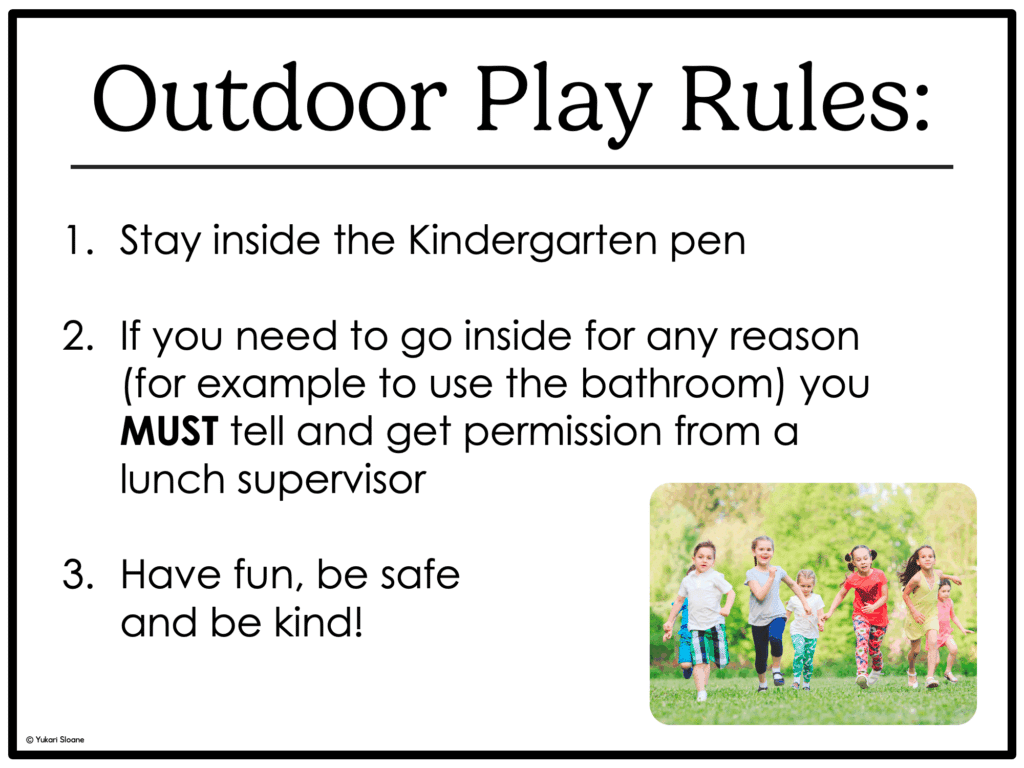
Outdoor Play Rules: Chat with your supervisor if you can to quickly touch base on any expectations they want you to cover. Things I go over with students are:
Lunch & Recess – 60 minutes
Eat lunch! But also make sure to complete any important first day routines. For example, at one of the schools I worked at, parents filled in dismissal forms after drop-off on the first day. We had to pick them up from the division chair and quickly review them to familiarize ourselves with dismissal permissions.
If you work with a team, take a few minutes to check in with your colleagues. This is a great time to remind each other about any important first day procedures you might have overlooked in the busyness of the morning!
Entry / Book Box – 15 minutes
As students come in, I remind them of our entry routines—switch shoes and put hats away. Then I invite them to grab their book box. We use white magazine boxes from IKEA, each labeled with the student’s name on a sticker. You can see it in the picture below! (There are more book boxes in the counter behind! I did indeed have more than 17 students and splitting up where we put them away makes it a little less chaotic as less kids are trying to put them away in one location!)
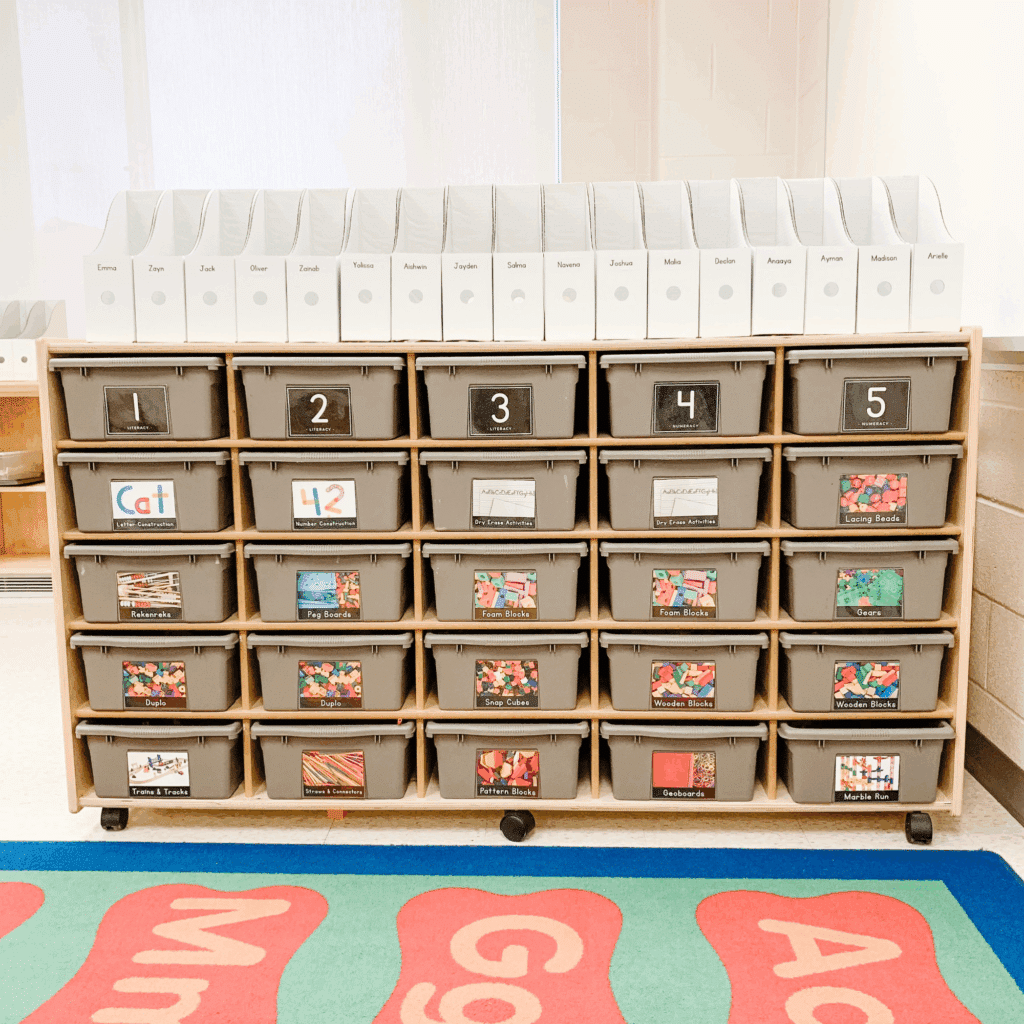
This is a great way to see who can already recognize their name. Once they have their book box, students sit on the carpet and quietly read or look through their books until everyone is settled.
💡 Teacher Tip:
Start the year with alphabet decodables and high interest books. As the year progresses you can add other quiet activities that fit the needs of each child (based on assessments) like simple alphabet puzzles, letter tracing, a journal, decodable readers etc. I rotate the books/activities every Friday.
On the first day, I keep this time very short. In years with staggered entry (SKs in the morning, JKs joining in the afternoon), I sometimes used a story from StorylineOnline.net instead. This keeps the rest of the group engaged and independent while we help the new friends who just joined. (It’s also a fantastic resource for indoor recess!)
Once everyone is settled, we put our book boxes away and often sing the Name Song a few more times to keep practising names. Normally, this time is reserved for math, but during the first few days I like to use it for a second read-aloud instead.
Carpet Time – 15 minutes
For my second story, I would read Tiny T. Rex and the First-Day Oopsies. I picked this book up a few months ago, and it has quickly become a favourite for the first week of Kindergarten! In the story, Tiny is a little dinosaur who’s excited for his first day of “big school.” He ends up making more “oopsies” than he expected—but his teacher reassures him that we all make mistakes, and that’s what school is for. We make an oopsy, learn from it, and then we grow. By the end, Tiny embraces his oopsies and is excited to learn even more the next day.
After the story, I remind students that we all make oopsies, and the important thing is to learn and grow from them. Then I introduce our self-portrait activity, just like Tiny does in the book. I show the self-portrait papers and explain that I’ll be calling small groups to my table to work on their drawings while the rest of the class continues at centres. We continue to work on these during the week and it becomes our first writing piece for our writing wall!

Learning Centres – 60 minutes
Especially if you have new students joining in the afternoon, take a moment to review the “At Centres” anchor chart. Then, give a quick introduction to the afternoon centres. Again, I keep these as simple and high-interest as possible to encourage engagement—especially during the first week when students are still learning routines!
In the afternoon, I like to mix in numeracy-based centres along with play-based ones. We choose a few friends at a time to pick their starting centre until everyone has a spot.
Here are the centres I put out in the afternoon on the first day:
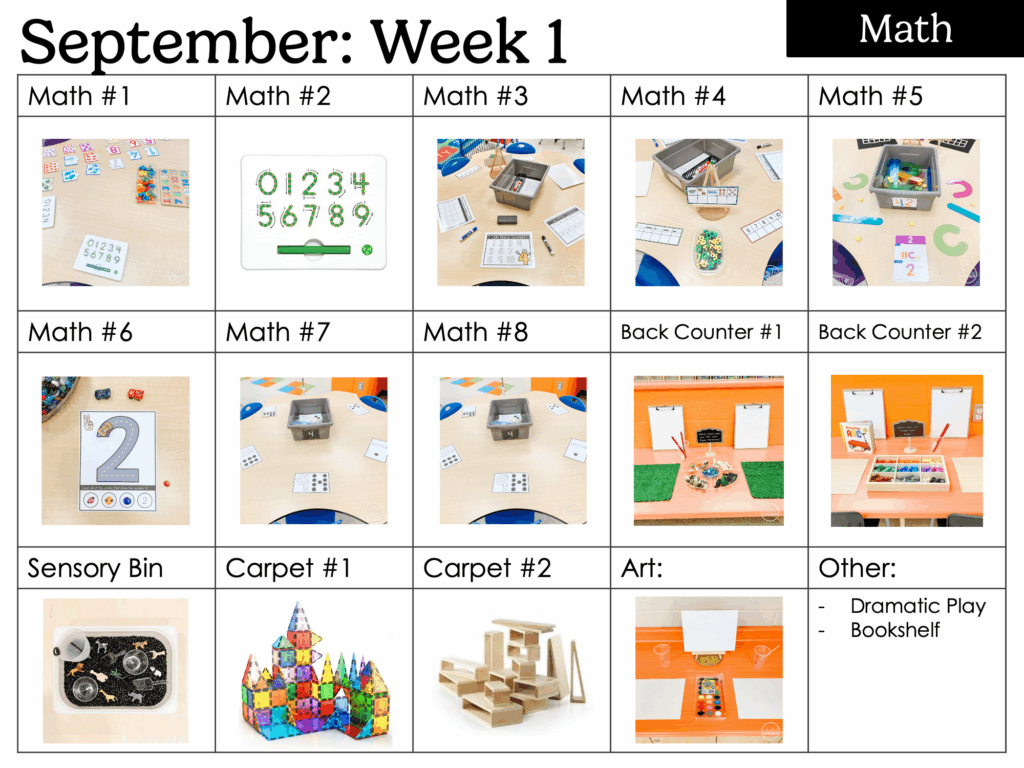
And here’s a bit more detail about each centre!
Number Construction
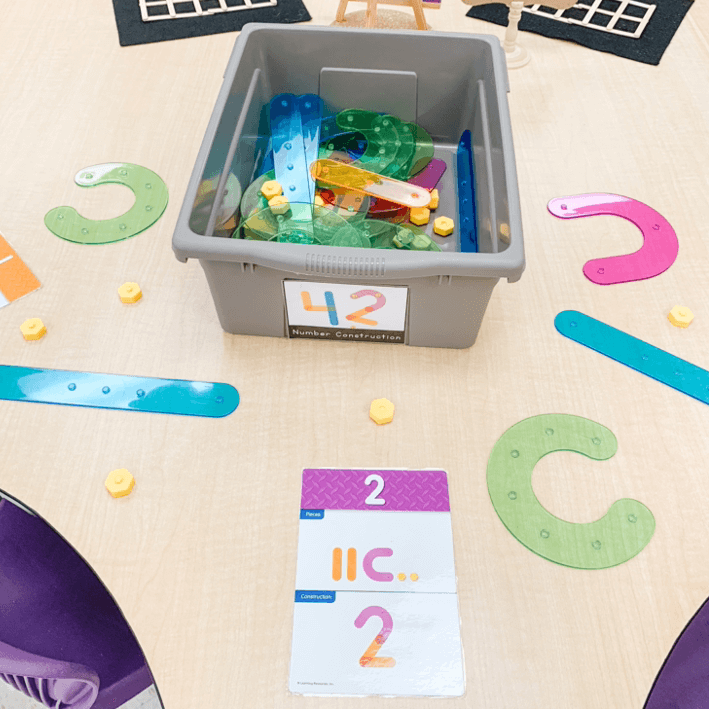
This centre combines hands-on building with number recognition and formation practice (with a pencil!). Using colourful pieces that connect with pegs, students can construct each numeral, helping them understand its shape and structure. This tactile approach supports fine motor development, hand-eye coordination, and spatial reasoning while reinforcing number identification. The open-ended nature of the activity also encourages problem-solving as students figure out how to assemble each numeral correctly.
I bought this centre from Scholar’s Choice I think. You an also get it on Amazon here.
Number Play Dough
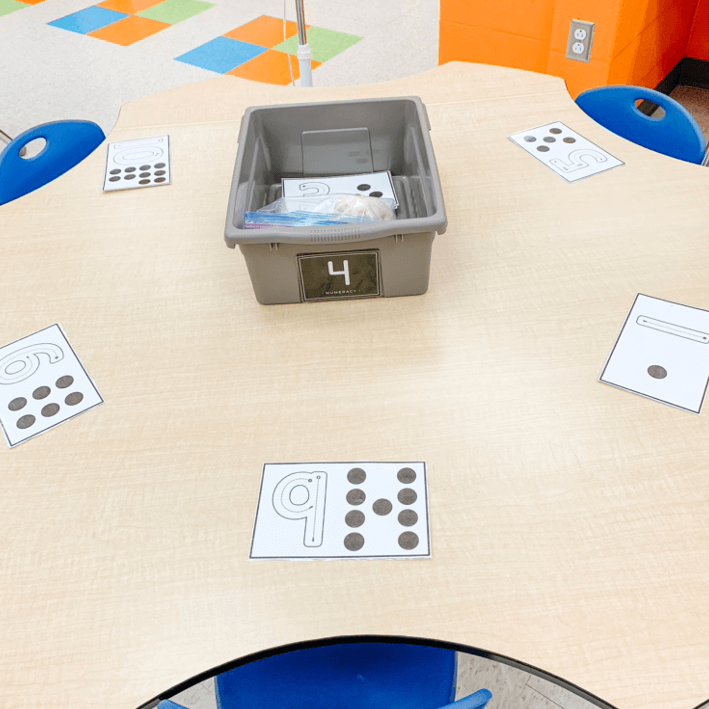
This centre combines sensory play with early numeracy skills. Students roll and shape playdough to form each numeral, strengthening fine motor muscles and improving hand control needed for writing. The accompanying dots encourage counting and number sense, helping students connect the numeral to a matching quantity. This hands-on, tactile approach keeps learning engaging while reinforcing both number recognition and formation!
You can grab these for FREE from my TPT store here.
Number MagnaTabs + Puzzles
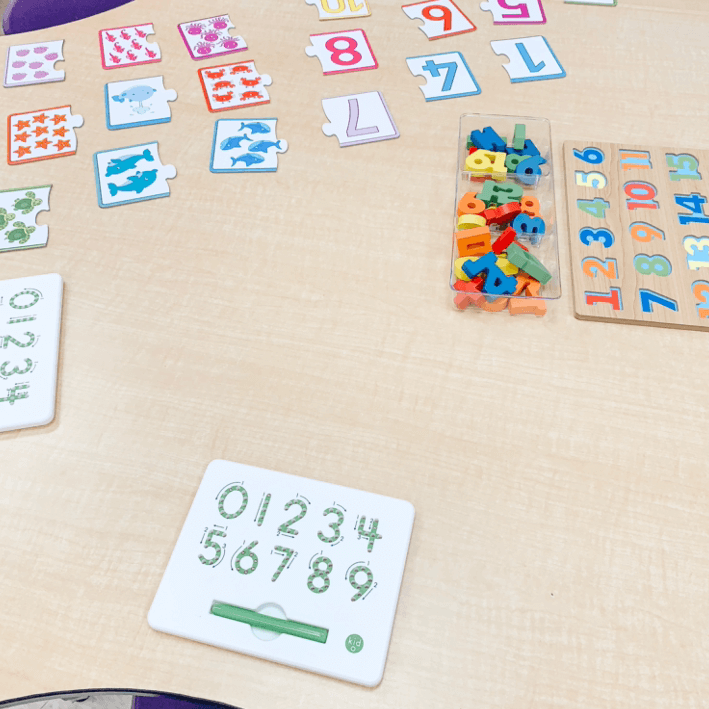
My students LOVE these MagnaTabs! They use a magnetic stylus to trace each numeral and enjoy feeling the satisfying “click” of the beads as they follow the correct formation path. It’s fantastic for building fine motor strength and developing the muscle memory needed for number writing. Even my most reluctant writers—and those who don’t usually prefer “academic” centres—are drawn to this activity!
The number puzzles reinforce number recognition, counting, and one-to-one correspondence, while also encouraging problem-solving skills and persistence.
Here are the other centres we put out, alongside number construction, number roads and number matching:
- Magnetic Tiles – These colourful magnetic shapes are perfect for building both 2D and 3D structures. They’re a hit for sparking creativity while strengthening spatial awareness, problem-solving skills, and collaboration.
- Number Tracing – Laminated tracing cards and dry erase markers let students practise proper number formation in a fun, low-pressure way. I also like to add blank dry erase boards for the kiddos who prefer to draw their own pictures or “write” their own stories—keeping it open-ended means more students stay engaged! You can get the tracing sheets I put out for FREE here.
- Number Matching – This simple but effective centre encourages number identification, visual discrimination, and one-to-one correspondence. It’s a great choice for building early numeracy confidence in a playful way. You can find the number matching cards I use here.
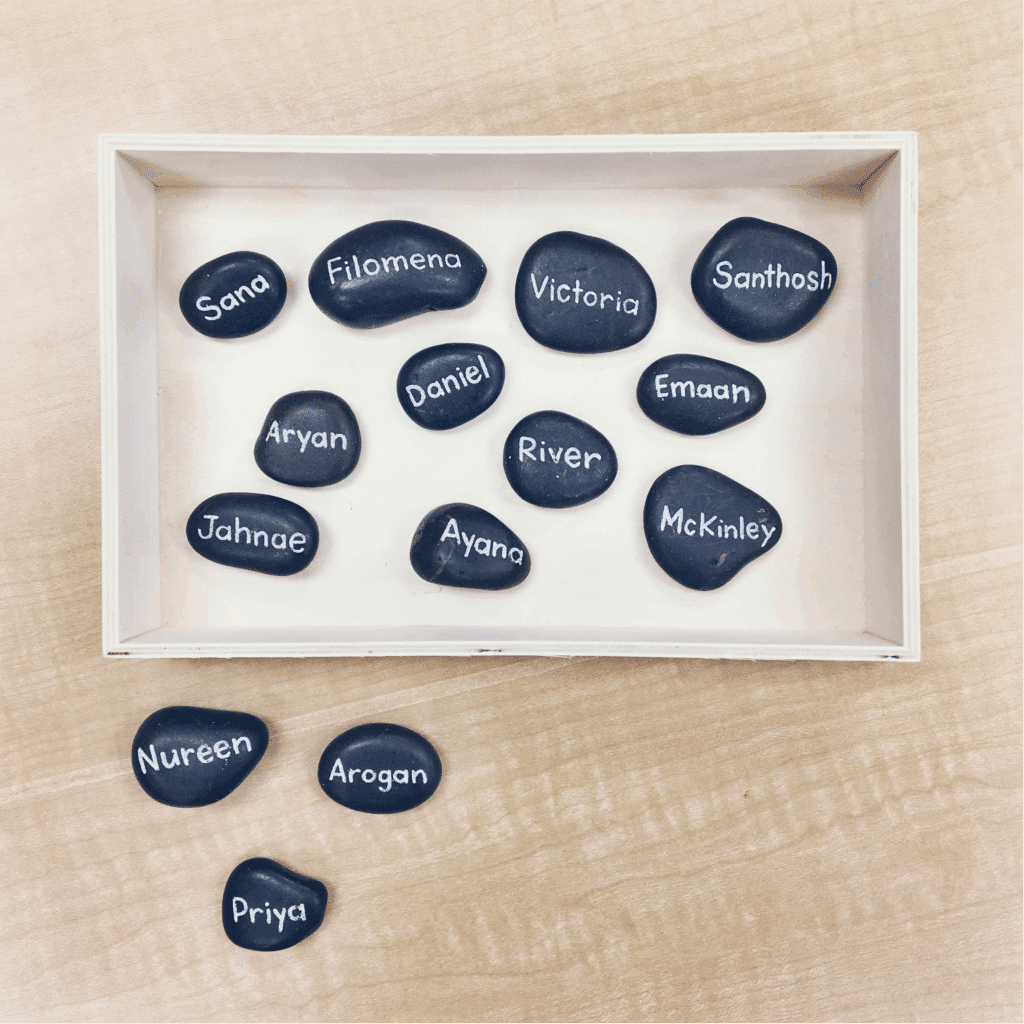
Free-Flowing Snack Table – We love having a free flowing snack table when our schedule allows for it! Students can independently enjoy their snack during centre time, freeing you up for small-group work and reducing big transitions. We have name rocks we put out on the snack table with a box. We empty the box and place the rocks on the snack table when I set up afternoon centres. Then we teach the student to put their rock in the box when they have eaten snack. This way it’s easy to see who/how many kids haven’t had snack and call them accordingly 10-15 minutes before centre time is over to ensure everyone gets a chance to eat!
Centres that are the same as the morning: sandbox, sensory bin, book shelf, dramatic play, painting, small world play and Lego.
Once everyone has chosen a centre and is happily engaged, I use this time to pull any students I didn’t have a chance to photograph in the morning, as well as small groups for their self-portrait and name-writing piece (if time allows!).
💡 Teacher Tip:
I also make a point to walk around, check in with students, and snap photos of them enjoying their centres. These candid moments are wonderful for sharing with families once I have their contact information, they love seeing their child’s first-day excitement in action, and it’s a great way to build positive connections with families right from the start!
Carpet Time #3 – 30 minutes
Have students practise their clean-up routines and then come to the carpet. If there’s time, invite a few students to share their favourite part of the day—this is a great way to end on a positive note and help them reflect on their experiences.
Next, go over dismissal routines and outdoor play rules. Be specific and clear about what is and isn’t allowed—especially if there are any differences between regular recess play and end-of-day play—so students know exactly what to expect, prevent confusion (as much as possible!) and sets the tone for safe, respectful play and dismissal.
Outdoor Play & Dismissal – 30 minutes
We start by getting ready to pack up and go outside. I keep a bin with students’ agendas/zippy bags and pull them out one at a time, calling each student to get ready. I remind them to show their agenda/zippy to their parents when they get home and to bring it back every day. I also tell students where I want them to line up once they’re ready.
Once everyone is ready, we review outdoor rules one last time. I tell them where to put their backpacks when we get outside, and we talk about what to do when the bell rings. In my class, students place their backpacks in a line by our gate. When the bell rings, they return to their backpacks and line up again.
I explain that dismissal on the first day might take a little longer since I’m still learning who their parents and pick-up people are. Students must wait until I call them to the front so I can be sure they’re leaving with a safe adult. I show them my dismissal clipboard and explain that I check each student off as they leave. If a student left through another gate without telling me or my teaching partner… I would think they were missing and that would be a big problem! When I explain why it’s so important—so we can make sure everyone gets home safely—students really understand.
You can find my dismissal checklist and other first day/week forms here.
It’s also important to check your school’s dismissal rules before the first day. Can you let students go a few minutes early if their parents are there, or do they need to be signed out at the office? Some schools are strict about not dismissing anyone before the bell, so know the expectations and be ready to explain that it’s a school-wide rule if parents ask.
In my class, we have all walkers, so we get outside early and let the kids play. As parents arrive, we greet them—this is a great way to start learning who each child’s pick-up people are. When the bell rings, students line up at their backpacks, and I call them one at a time to meet their pick-up person. Once everyone is safely picked up, we head back into the classroom.
If you have bus kids or kiss and ride you will need a plan for one of the educators to take those kids to their designated dismissal spots.
Phew! That’s a lot to remember on the first day. People often say if the kids all come, have fun, and leave safely, it’s a first day win—and I couldn’t agree more. Don’t stress too much about centres or guided work. Focus on rules, routines, procedures and connections first! Only get to small group work (like the September writing page I mentioned earlier) if you have time.
The Rest of the Week
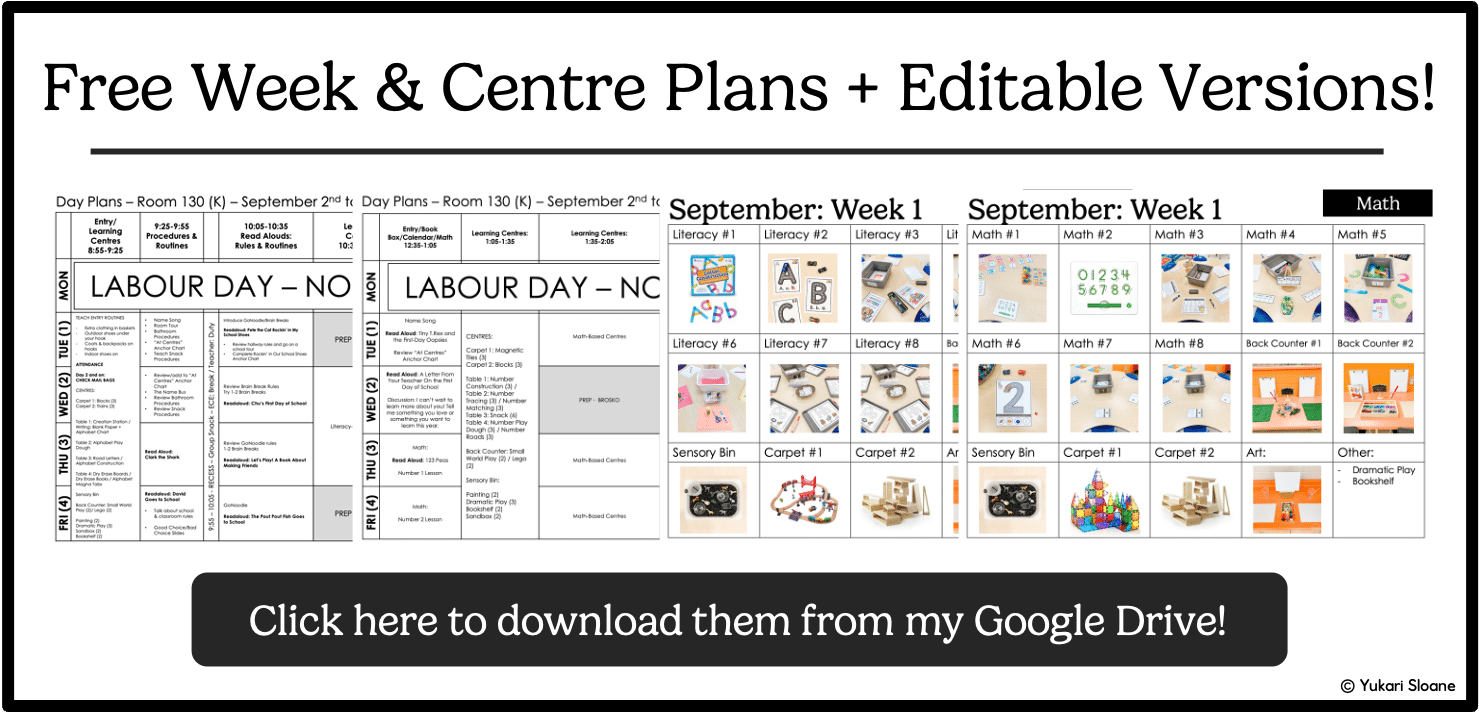
The rest of the first week follows a similar structure and repetition, so instead of rewriting it all here, I’m sharing my week plans in case you’d like to take a look. You can download the PDF by clicking here or on the image below. It also include the centre plans and I linked as many of the centres as I could directly in the pdf! If you hover over something and the arrow turns into a little hand with a finger up you’ll know there’s a link there!
There’s also an editable PowerPoint version of both so you can tweak anything you needed to to fit the needs of you classroom/school!
One of the key programs we use early on is Kelso’s Choices, a social problem-solving program I’ve used since my very first year of teaching. It introduces a variety of Kindergarten-friendly strategies for solving social problems independently. You can learn more by visiting their website: http://kelsoschoice.com.
My son’s school recently adopted MindUP which is described as a curriculum that teachers students to regulate emotions, focus attention and build empathy. I’m not sure if it was just him maturing this year, his teacher this year or a combination of all 3 (the new SEL curriculum) but it seemed to really have a positive impact on him! If you’re school is looking for a new curriculum it could be a good choice! You can read more about their program here: https://www.mindup.org/
Want the slides I made to help run my first week? You can find those here or by clicking on the image below:
I hope you found this helpful and that it gives you some fresh ideas for what to do on the first day (and week!) of school.
Wishing you a smooth, successful, and joy-filled first day!


